Requirements#
- Linux machine (I’m using WSL running ubuntu 24.04 in this example)
- ESXi 8.0U3 ISO (it should work in older versions, but some parameters may be different)
Key objectives#
- Spin up a temporary HTTP server that you can use in field for mass ESXi deployment
- Create a custom ESXi ISO file with boot.cfg edited to read ks.cfg from a HTTP server
- Explain the logic behin my scripts
The custom ISO#
Edit the BOOT.CFG#
Download the latest ESXi ISO from Broadcom portal here
Mount that ISO file into your system and copy the content of the ISO to a directory inside of your linux machine (in my case is /home/novello/ESXi8/)
Once you have those files on a directory, is time to edit the file BOOT.CFG, responsible for specifying where is the kickstart file
vi /home/novello/ESXi8/EFI/BOOT/BOOT.CFGand
vi /home/novello/ESXi8/BOOT.CFG- Edited lines:
timeout: Removed the splash screen to skip the “loading” screen.kernelopt: Added the path to theks.cfgfile hosted on the web server.
bootstate=0
title=Loading ESXi installer
timeout=0 # Here I removed the timeout to not show the "loading" screen
prefix=
kernel=/b.b00
kernelopt=runweasel ks=http://192.168.100.32:8000/ks.cfg # Here I added the ks.cfg file to the boot options, loaded from a web server
modules=/jumpstrt.gz --- /useropts.gz --- /features.gz --- /k.b00 --- /uc_intel.b00 --- /uc_amd.b00 --- /uc_hygon.b00 --- /procfs.b00 --- /vmx.v00 --- /vim.v00 --- /tpm.v00 --- /sb.v00 --- /s.v00 --- /atlantic.v00 --- /bcm_mpi3.v00 --- /bnxtnet.v00 --- /bnxtroce.v00 --- /brcmfcoe.v00 --- /cndi_igc.v00 --- /dwi2c.v00 --- /elxiscsi.v00 --- /elxnet.v00 --- /i40en.v00 --- /iavmd.v00 --- /icen.v00 --- /igbn.v00 --- /intelgpi.v00 --- /ionic_cl.v00 --- /ionic_en.v00 --- /irdman.v00 --- /iser.v00 --- /ixgben.v00 --- /lpfc.v00 --- /lpnic.v00 --- /lsi_mr3.v00 --- /lsi_msgp.v00 --- /lsi_msgp.v01 --- /lsi_msgp.v02 --- /mtip32xx.v00 --- /ne1000.v00 --- /nenic.v00 --- /nfnic.v00 --- /nhpsa.v00 --- /nipmi.v00 --- /nmlx5_cc.v00 --- /nmlx5_co.v00 --- /nmlx5_rd.v00 --- /ntg3.v00 --- /nvme_pci.v00 --- /nvmerdma.v00 --- /nvmetcp.v00 --- /nvmxnet3.v00 --- /nvmxnet3.v01 --- /pvscsi.v00 --- /qcnic.v00 --- /qedentv.v00 --- /qedrntv.v00 --- /qfle3.v00 --- /qfle3f.v00 --- /qfle3i.v00 --- /qflge.v00 --- /rdmahl.v00 --- /rste.v00 --- /sfvmk.v00 --- /smartpqi.v00 --- /vmkata.v00 --- /vmksdhci.v00 --- /vmkusb.v00 --- /vmw_ahci.v00 --- /bmcal.v00 --- /clusters.v00 --- /crx.v00 --- /drivervm.v00 --- /elx_esx_.v00 --- /btldr.v00 --- /dvfilter.v00 --- /esx_ui.v00 --- /esxupdt.v00 --- /tpmesxup.v00 --- /weaselin.v00 --- /esxio_co.v00 --- /infravis.v00 --- /loadesx.v00 --- /lsuv2_hp.v00 --- /lsuv2_in.v00 --- /lsuv2_ls.v00 --- /lsuv2_nv.v00 --- /lsuv2_oe.v00 --- /lsuv2_oe.v01 --- /lsuv2_sm.v00 --- /native_m.v00 --- /qlnative.v00 --- /trx.v00 --- /vcls_pod.v00 --- /vdfs.v00 --- /vds_vsip.v00 --- /vmware_e.v00 --- /hbrsrv.v00 --- /vsan.v00 --- /vsanheal.v00 --- /vsanmgmt.v00 --- /tools.t00 --- /xorg.v00 --- /gc.v00 --- /imgdb.tgz --- /basemisc.tgz --- /resvibs.tgz --- /esxiodpt.tgz --- /imgpayld.tgz
build=8.0.3-0.0.24022510
updated=0
Compile the new files into a new custom ISO#
Here’s where the magic happens, how do we compile all those previous extracted files into a new custom .ISO? Simple!
Parameters you need to change:
-o: Path/name of the file you want to save. In this example/home/novello/ESXi8U3_custom.iso- Path where the ISO was extracted, in my case
/home/novello/ESXi8
genisoimage -relaxed-filenames -J -R -o /home/novello/ESXi8U3_custom.iso -b ISOLINUX.BIN -c BOOT.CAT -no-emul-boot -boot-load-size 4 -boot-info-table -eltorito-alt-boot -e EFIBOOT.IMG -no-emul-boot /home/novello/ESXi8ks.cfg (where the magic really happens)#
- Okay, so in the BOOT.CFG I informed that when the host boots up, it should read a kickstart file and use the logic in there to start configuring the ESXi.
Key objectives ks.cfg#
- Load ESXi installation and accept the EULA
- Define root password
- Grab initial IP using vmnic0 and DHCP
- Enable SSH/Bash shell
- Executes python script that will configure definitive IP / Hostname on the host
vmaccepteula
rootpw VMware123!
install --firstdisk --overwritevmfs
network --bootproto=dhcp --device=vmnic0
reboot

%firstboot --interpreter=busybox

# Wait for the network to start
sleep 5

# Enable SSH and ESXi Shell
vim-cmd hostsvc/enable_ssh
vim-cmd hostsvc/start_ssh
vim-cmd hostsvc/enable_esx_shell
vim-cmd hostsvc/start_esx_shell

# Suppress ESXi Shell warning
esxcli system settings advanced set -o /UserVars/SuppressShellWarning -i 1

# Adjust the time zone
cp /usr/share/zoneinfo/America/Sao_Paulo /etc/localtime

# Download the host_config.py script and macs.csv file
wget http://192.168.100.32:8000/host_config.py -O /tmp/host_config.py
wget http://192.168.100.32:8000/macs.csv -O /tmp/macs.csv

# Make the script executable
# (Note: The script is already executable in the original code, but this is a good practice)
chmod u+x /tmp/host_config.py

# Run the host_config.py script
/bin/python3 /tmp/host_config.py
Key objectives of host_config.py#
- Python reads the macs.csv
- Based on the MAC address of vmnic0 it determines which IP/mask/gw/VLAN/hostname vmk0(management) will be configured
import os
import csv
import subprocess

CSVPATH = "/tmp/macs.csv"  # Path to the CSV file

# Get the MAC address of the host interfaces
MAC = subprocess.check_output(
    "esxcli network ip interface list | grep 'MAC Address' | awk '{print $3}'",
    shell=True
)

MACADDR = MAC.split()
print("MACs found:")
print(MACADDR)

# Read the CSV file and find the matching MAC address
with open(CSVPATH, 'r') as csvFile:
    csvReader = csv.reader(csvFile)
    next(csvReader)  # Skip the header row

    for csvRow in csvReader:
        # csvRow format: hostname,mac,ip,netmask,gateway,vlan
        if MACADDR[0].decode('utf-8').lower() == csvRow[1].lower():
            hostname = csvRow[0]
            ip = csvRow[2]
            netmask = csvRow[3]
            gateway = csvRow[4]
            vlan = csvRow[5]

            print(f"Configuring host {hostname} with IP {ip}")

            os.system(f"esxcli system hostname set --fqdn={hostname}")
            os.system(f"esxcli network ip interface ipv4 set --interface-name=vmk0 --ipv4={ip} --netmask={netmask} --type=static")
            os.system(f"esxcfg-route {gateway}")
            os.system(f"esxcfg-vswitch -p 'Management Network' -v {vlan} vSwitch0")
What macs.csv looks like
hostname,mac,ip,netmask,gateway,vlan
esxi01,00:50:56:11:22:33,10.1.99.101,255.255.255.0,10.1.99.1,99
esxi02,00:50:56:44:55:66,10.1.99.102,255.255.255.0,10.1.99.1,99
Spin up the HTTP server#
- I will use the same WSL instance I used to compile the ISO to serve as HTTP server
- I created a separate folder that will contain
ks.cfgmacs.csvandhost_config.py
python3 -m http.server -d /home/novello/http- On your browser, navigate to
http://<WSL_instance_IP>:8000, you should see something similar to
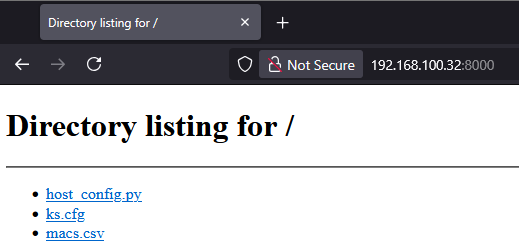
And that’s all, we’re ready to start our ESXi installation and it should configure the basics for us automatically.
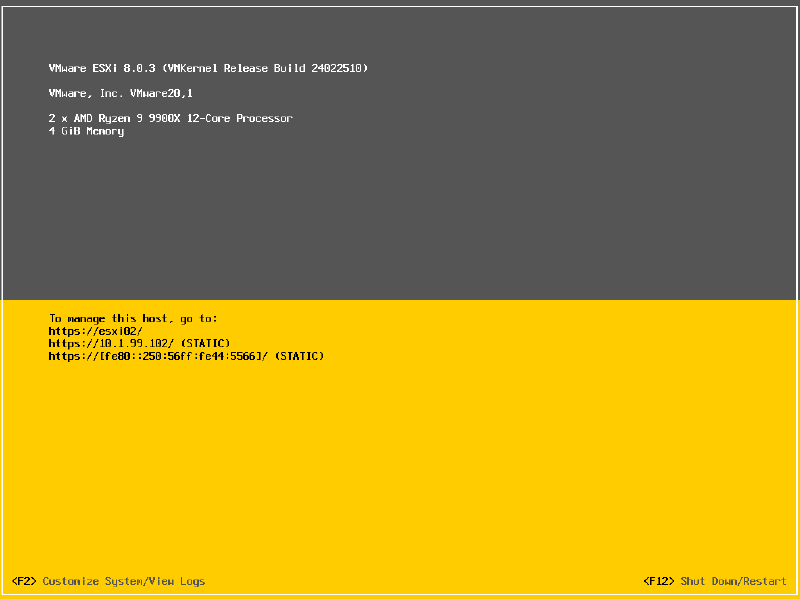
Installed#
- For testing purposes I created a VM into VMware workstation and customized the MAC address to match
esxi02of ourmacs.csv